I took the class using our compact SLR camera made by Sony called the Sony Alpha Nex-5. The camera was an (amazing!) engagement present from my siblings and I love the fact that it is small and light (just like a regular point-and-shoot digital camera) but you have the added benefits of an SLR with the interchangeable lenses! Even without knowing exactly how to use all the functions, just setting this baby on automatic has procured some of the best pictures I've ever taken in my life (during some of the biggest events of my life). And now that I'm not afraid to turn the dial and play around with the settings, I can't wait to see all that I'm able to do...
 |
| Sony Alpha Nex-5 |
Anyways, here are a few of the basic tips I learned that I thought some of you other beginners out there may find useful! Of course, this all means nothing if you don't get out there and practice!!
(For all the professionals out there, I apologize if my terminology is still a little rough - I'm still learning...but you get the picture!)
Pixel
Pixel is short of "picture element" and the more your camera has, the higher resolution photographs you can produce. More pixels also allow for larger prints. Since most people do not "blow up" every photo, ~10-14 mega pixel should suffice. Most electronics stores (i.e. Best Buy, etc.) will use mega pixels as a major selling feature, and you'll see the price go up as the number of mega pixels go up. But remember there are other important functions to consider! Like zoom, aperture and shutter speed to name a few!
Zoom
An ideal zoom lens capability is ~200mm. 300-400mm is great. We currently only have the standard zoom lens for our camera (18-55mm) and I just learned that that is comparable to what the human eye sees. Aka, we need a better zoom lens! Unfortunately, that baby retails for a whopping $800 so it looks like I'll be waiting for a Black Friday special...
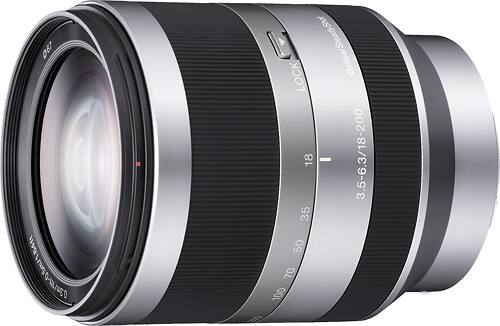 |
| 18-200mm E-mount lens - $799 |
On the other hand, Bud told me the wide-angle lens for my camera wasn't really necessary to buy. 15mm is really good for wide angle, but 18mm is good too.
 |
| 16mm wide angle lens - $249 |
Aperture:
Aperture is the round opening in the lens which allows light into the camera. The larger the number the smaller the opening. The openings are called F stops with F1.2 being VERY LARGE and F-22 being very small.
When you want to shoot close ups (or people, a building, etc.) and want the background soft (it's called soft not blurry), you want a LARGE aperture (or low number F-stop).
When you want to shoot with both the landscape and focal point (person, building, etc.) all in focus, you want to use a small aperture (or high number F-stop).
You can adjust your camera's aperture in the Aperture Priority setting on your camera. Note: My camera has a range from F-3.5 to 5.6 at the MAX and F-22 to 24 at the min. Bud said this is a very respectable range...
Shutter Speed:
The shutter speed opens and closes to allow the light to expose the film and the faster it opens and closes the better the action will be frozen.
The slower the shutter speed, from 1/60 second to 1 second , you should use a tripod.
You can adjust your camera's shutter speed in the Shutter Priority setting on your camera.
General Tips:
1. Read your camera's instruction manual. Duh!
2. When reading your instruction manual, learn how to set your camera to the highest resolution and picture quality. Often, the camera is pre-set with only the standard quality setting.
3. The golden hours for shooting are: one hour before sunrise and one hour before sunset. These are the two best times of day for outdoor photos. The skies are aglow and shadows melt into the background. Noon on a sunny day is the worst time.
4. Do not cut people in half! Go for a "bust" shot or a head to toe.
5. When shooting children and animals, get down on their level.
6. Shoot outdoors!
7. To prevent shados on the face when shooting on a sunny day with the sun behind the subject, have the subject hold a white foam board at the waist angled towards his/her face. The sun will reflect light from the board onto the face.
8. For really bright and vivid photos, set your camera on the Vivid setting! (That one is my personal fave!)
Anyways, I hope you found this post as helpful as I found my class to be! And if you're interested in taking your own class, I've seen a ton of great deals popping up on Groupon so keep your eyes peeled!
xoxo
No comments:
Post a Comment